7757-K111 C900 +24V Powered USB
Introduction
This kit provides a +24V Powered USB daughter card for NCR Columbus 900 terminals.
Note: The +24V Powered USB daughter card requires the Columbus 900 terminal to use the 150W Power Supply. The 150W Power Supply can be ordered as a kit, 7757-K122.
Required Tools
M3 Torx Screwdriver
Kit Contents
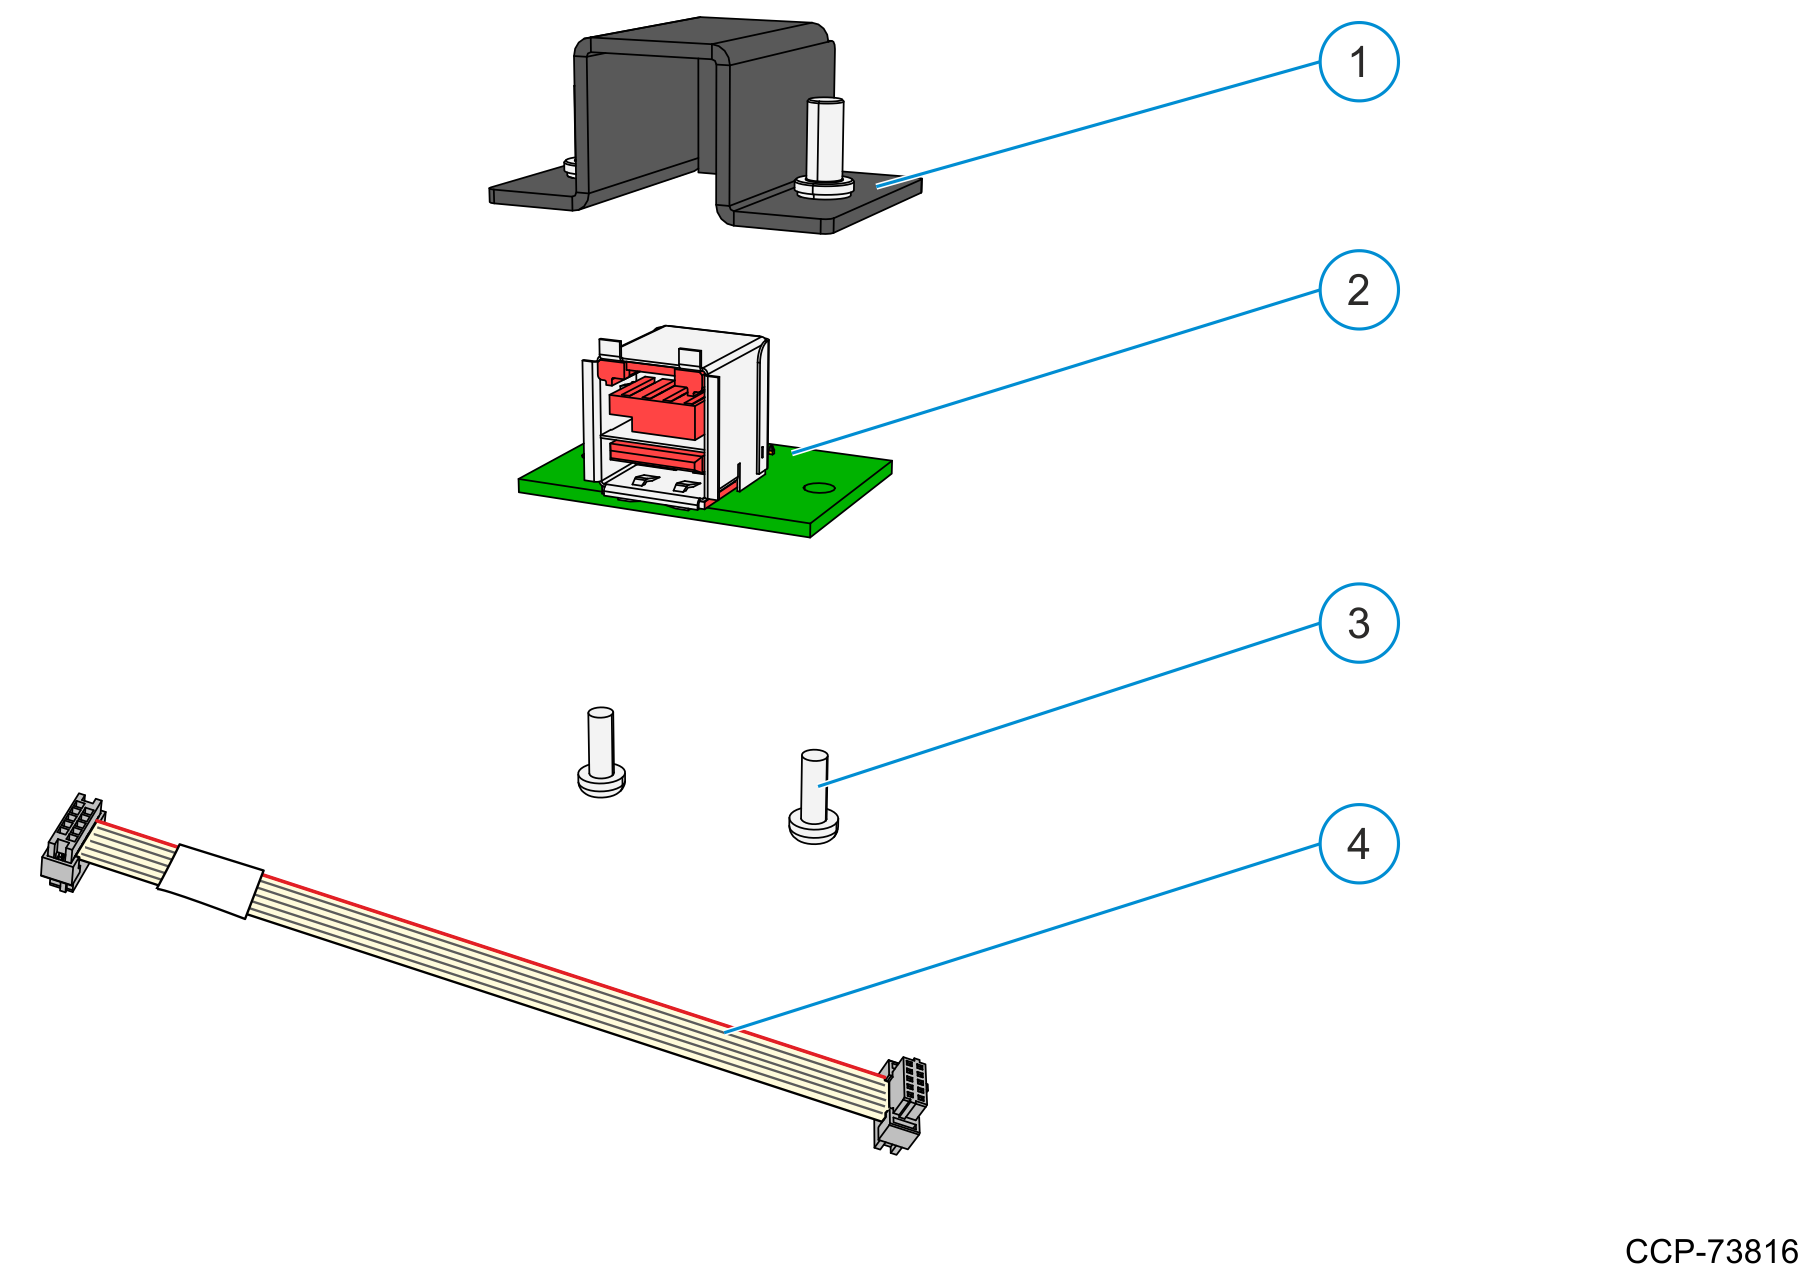
|
C900 +24V Powered USB (7757-K111) |
||
|---|---|---|
|
|
Part Number |
Description |
|
1 |
497-0481391 |
P1230 Power USB Cover |
|
2 |
497-0521636 |
+24V PUSB Columbus 900 Daughter Board Assembly |
|
3 |
006-8617789 |
M3x8 Pan Head Torx T10 Nylok S (2) |
|
4 |
497-0521684 |
Columbus 900, Power USB Cable, +24V |
Installation Procedure
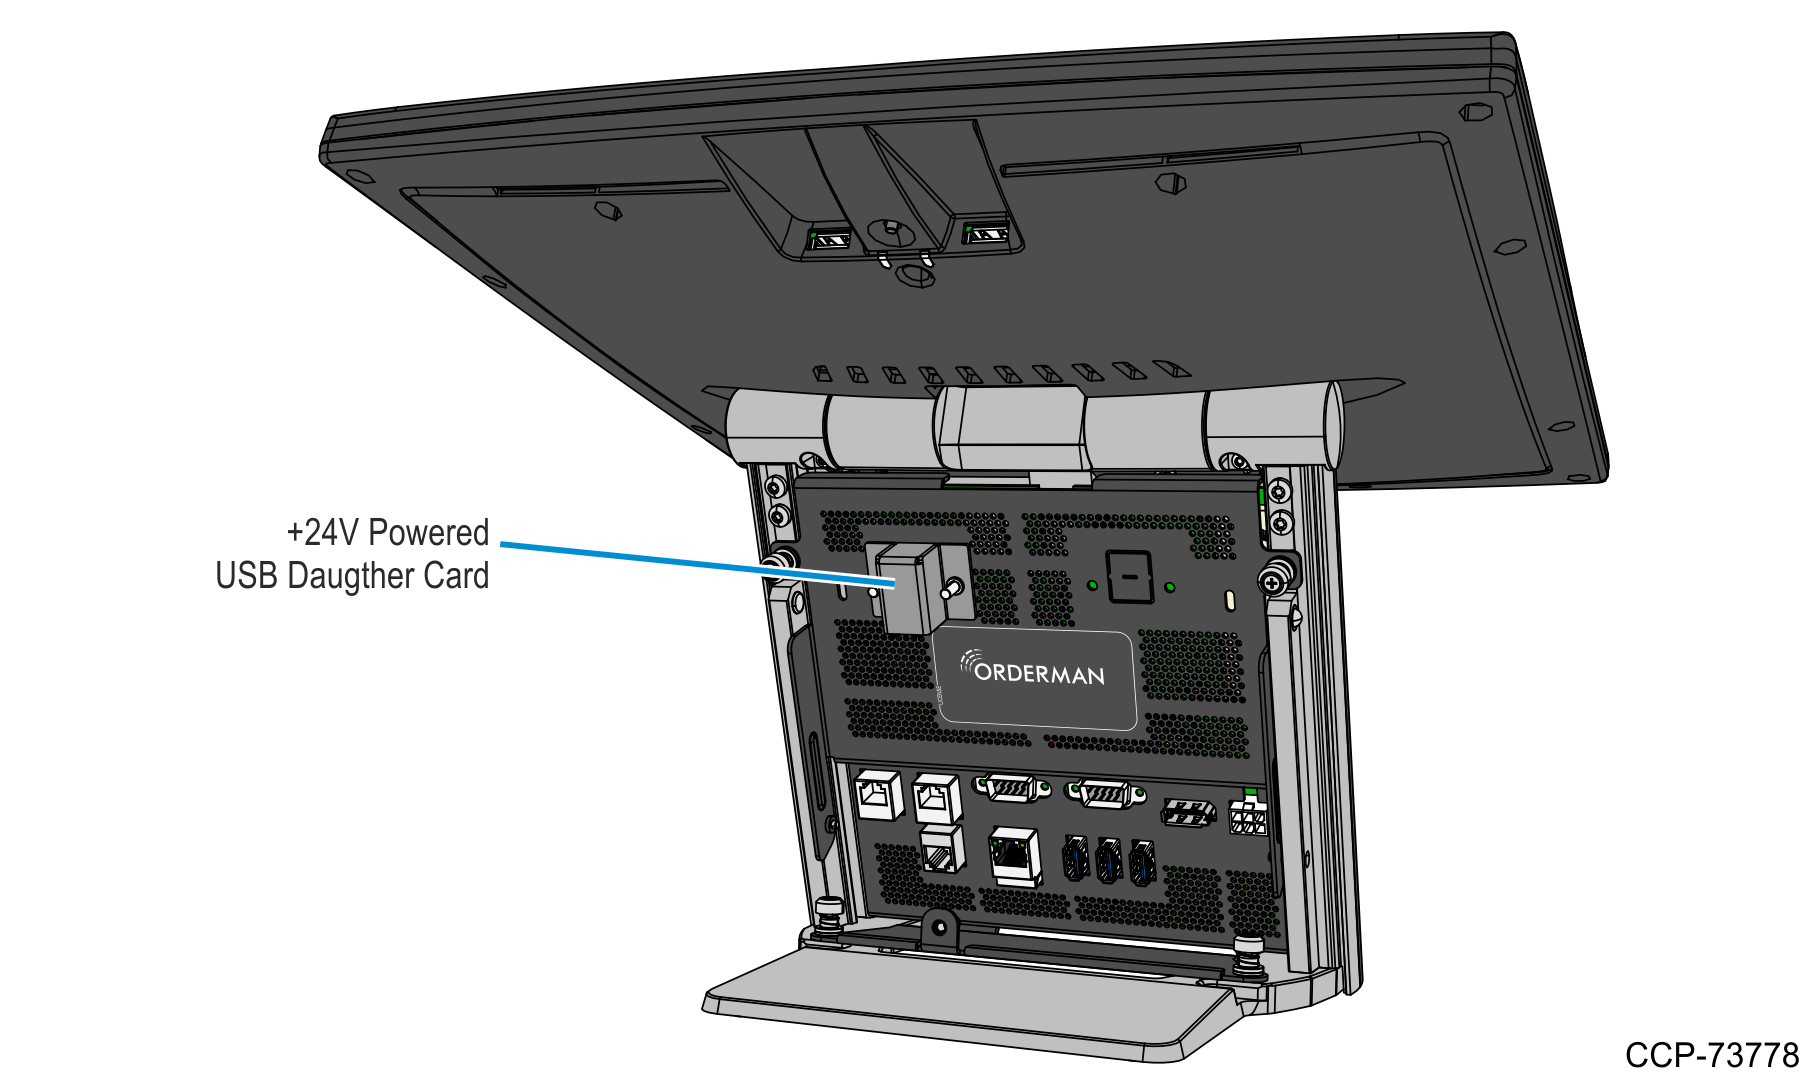
When viewing the terminal from the front side, the +24V Powered USB Daughter Card should be located on the left-hand side of the I/O Door.
To install the daughter card, perform the following steps:
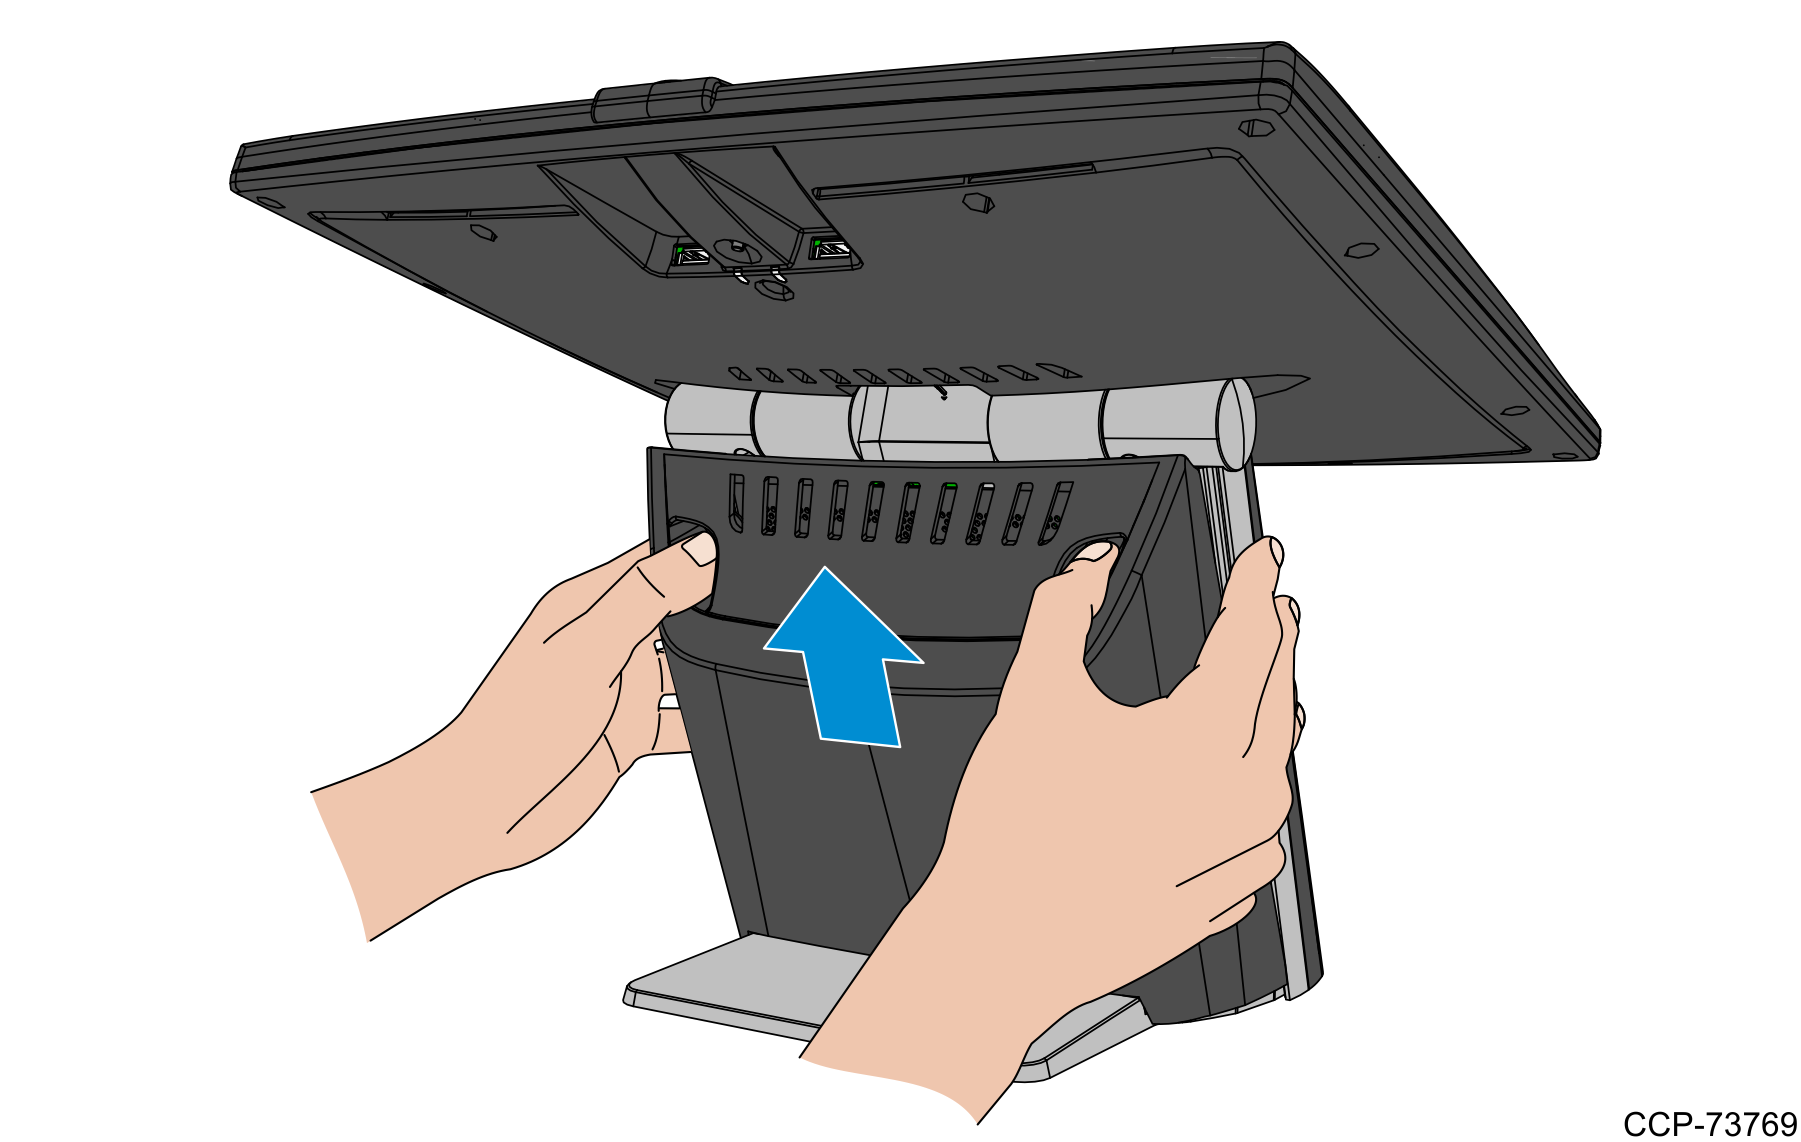
1.Tilt the Display backward.
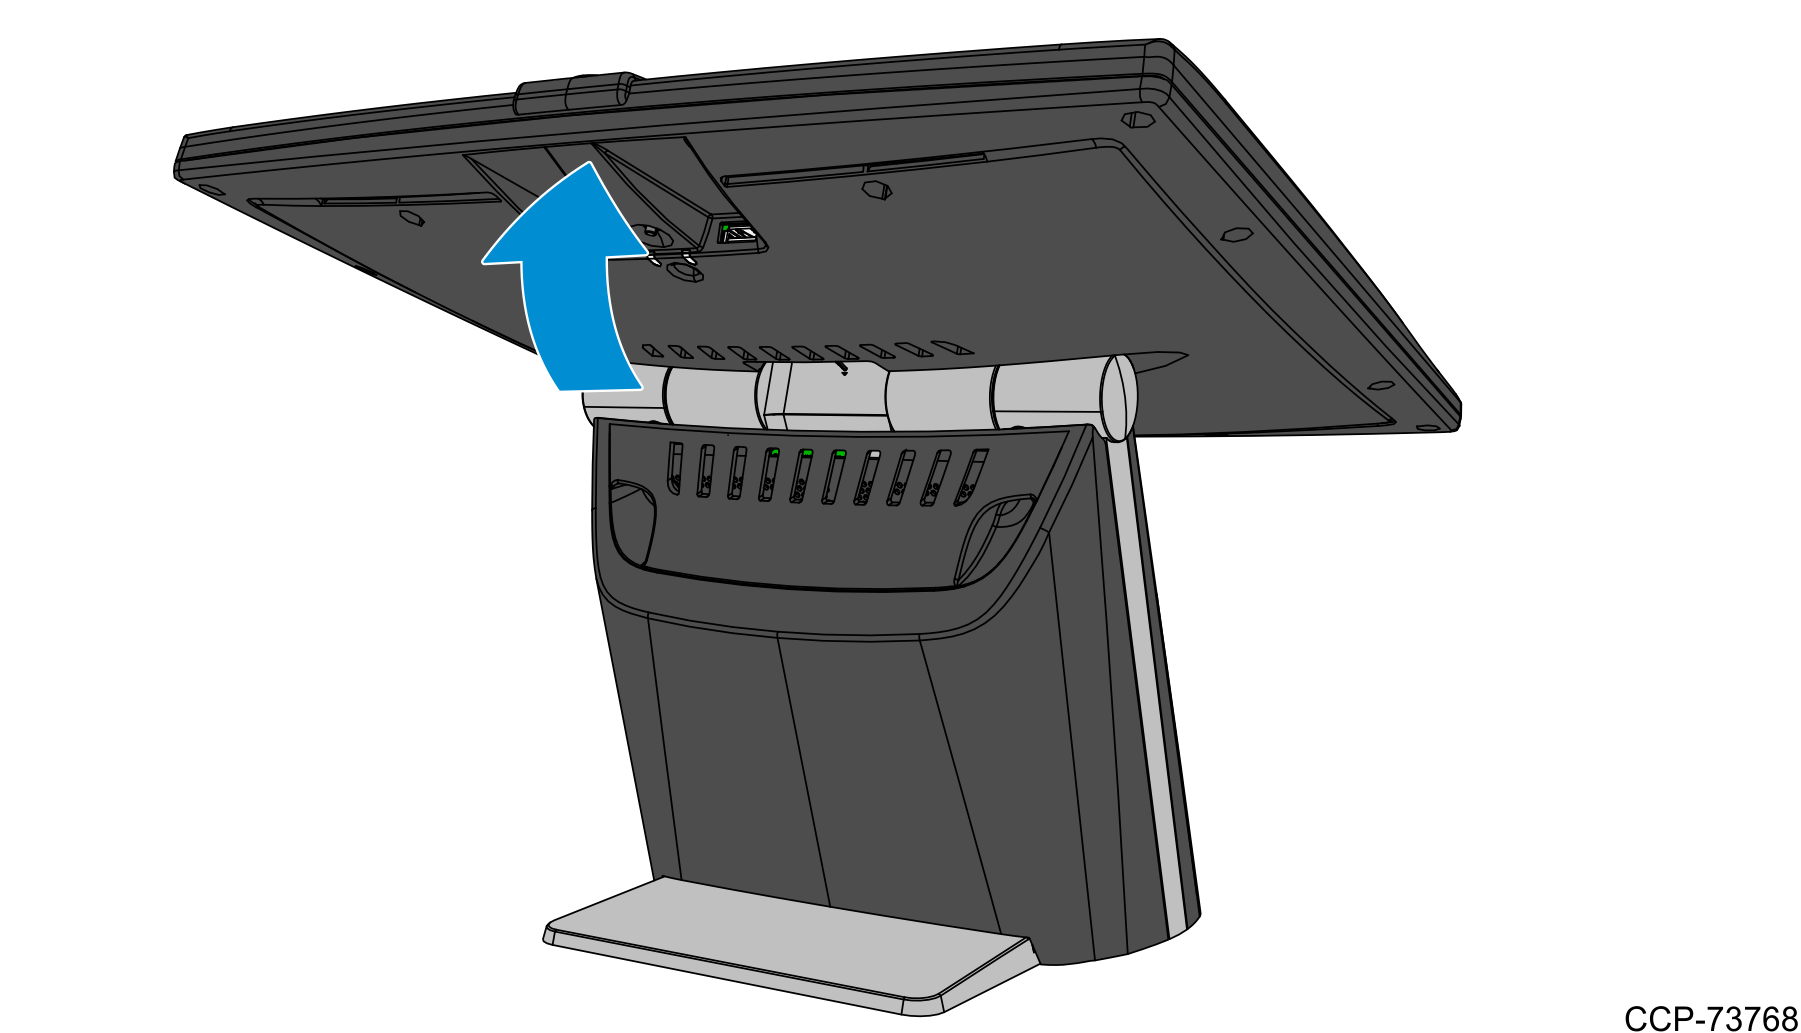
2.Slide the Front Cover upward to remove it from the stand.
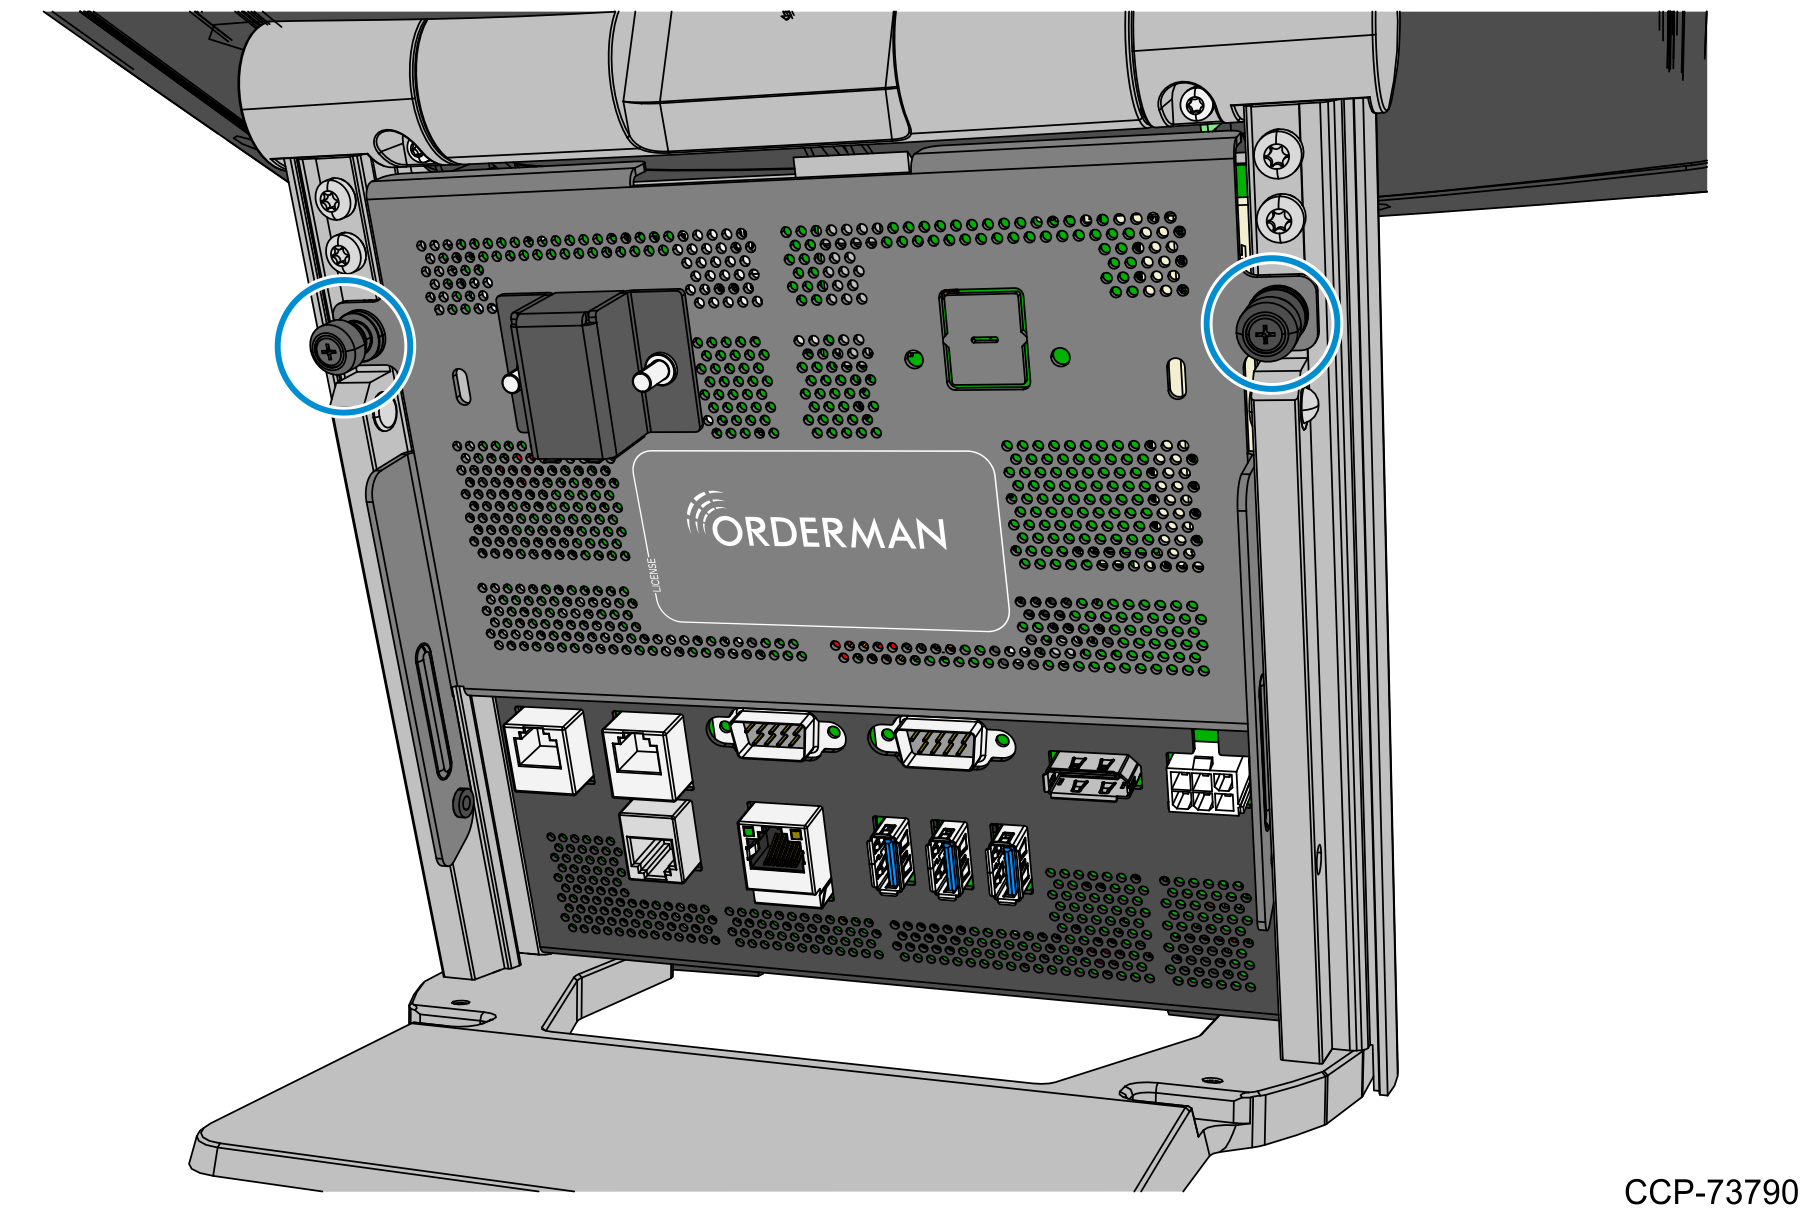
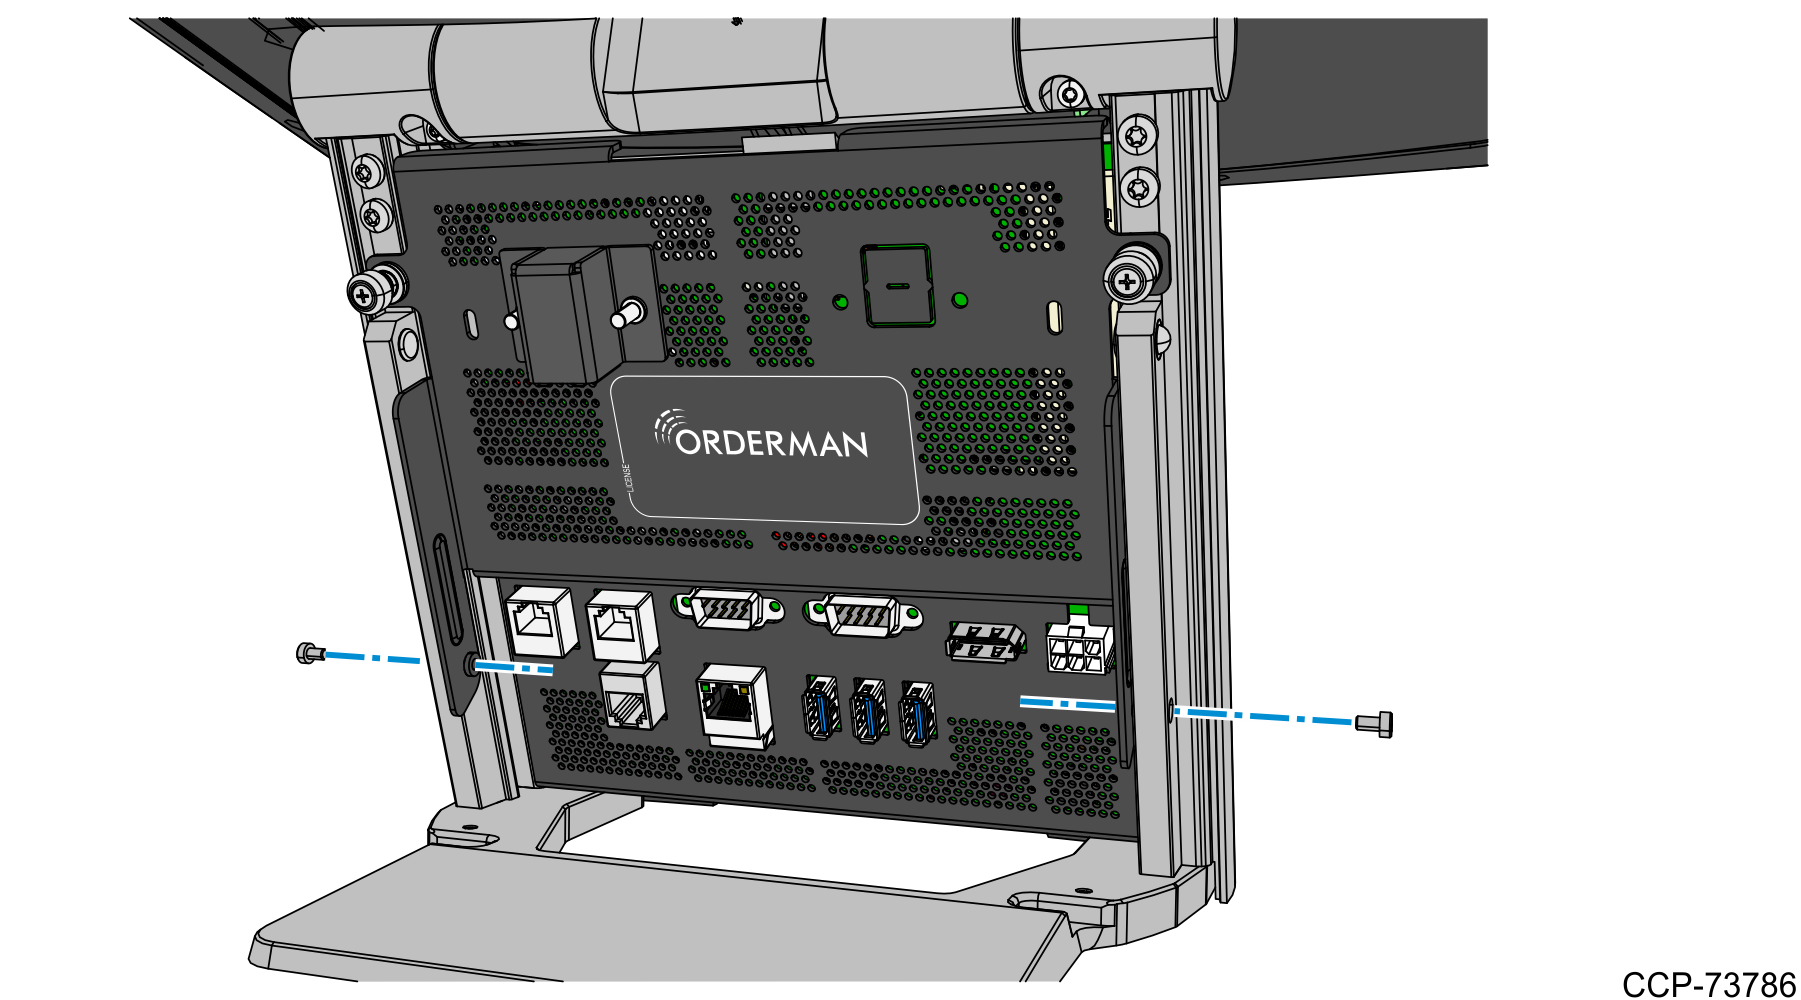
3.Remove the two M3 torx screws securing the bottom side of the I/O Door.
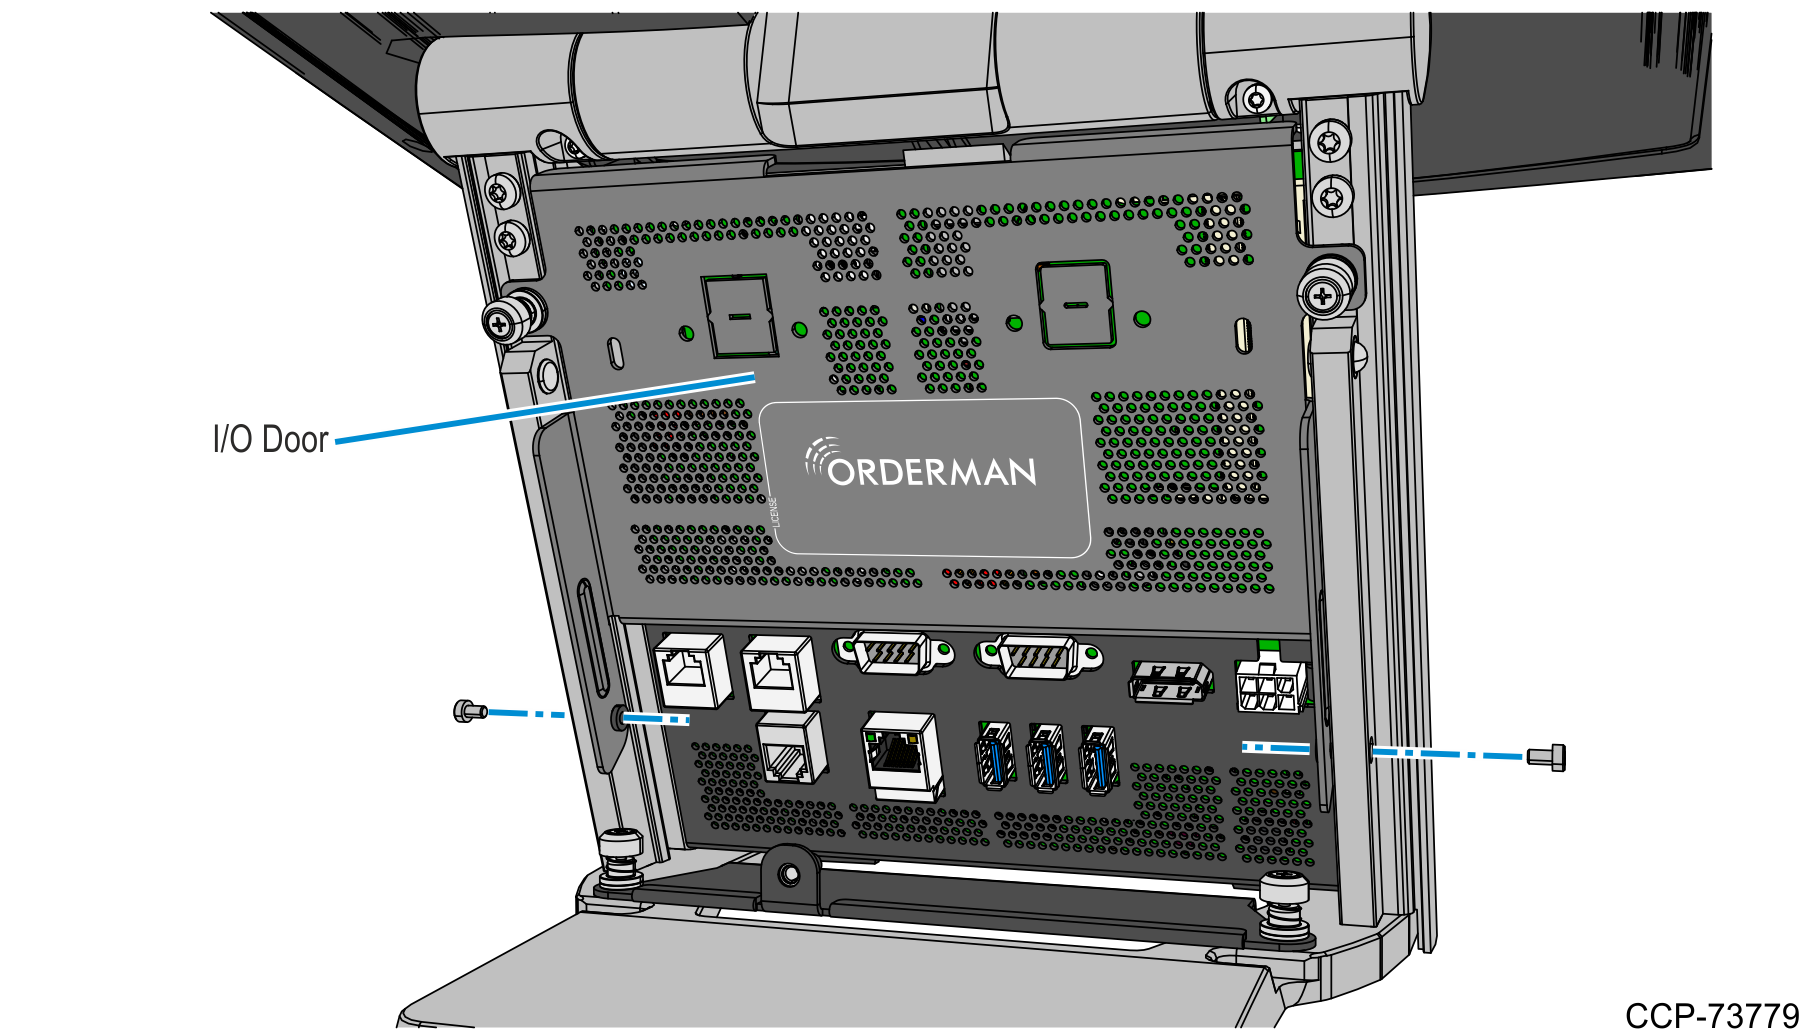
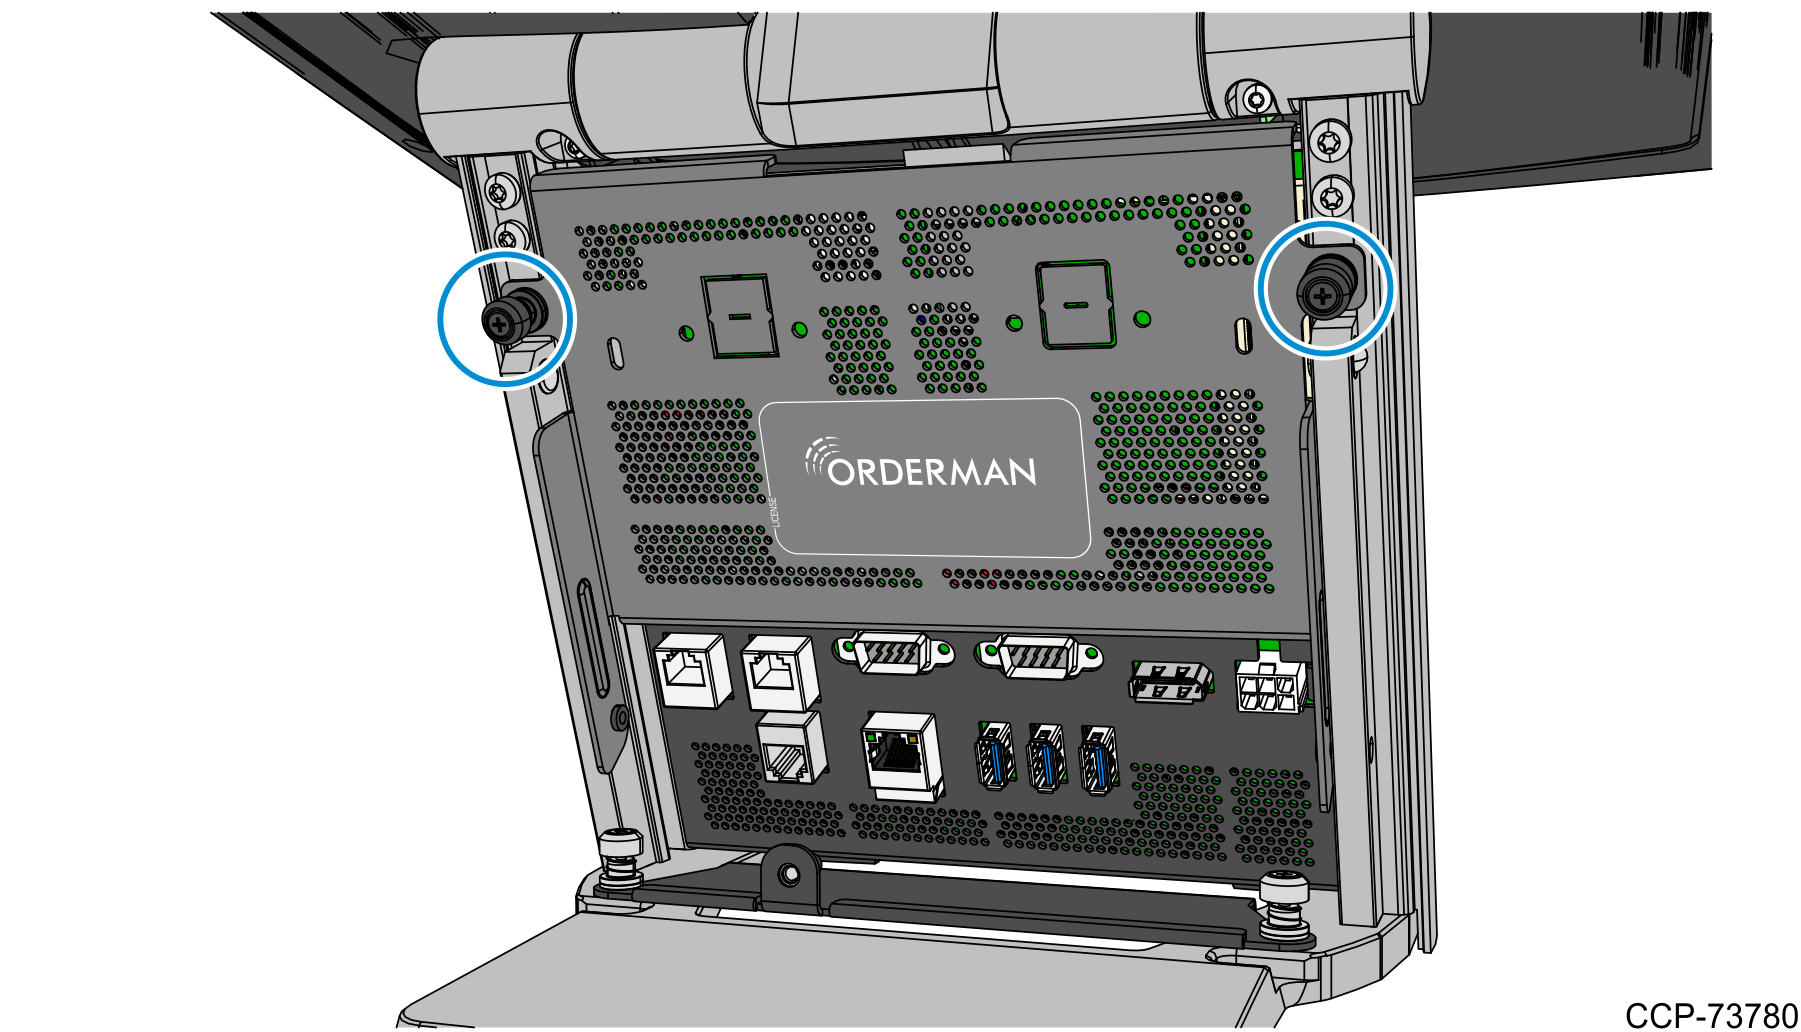
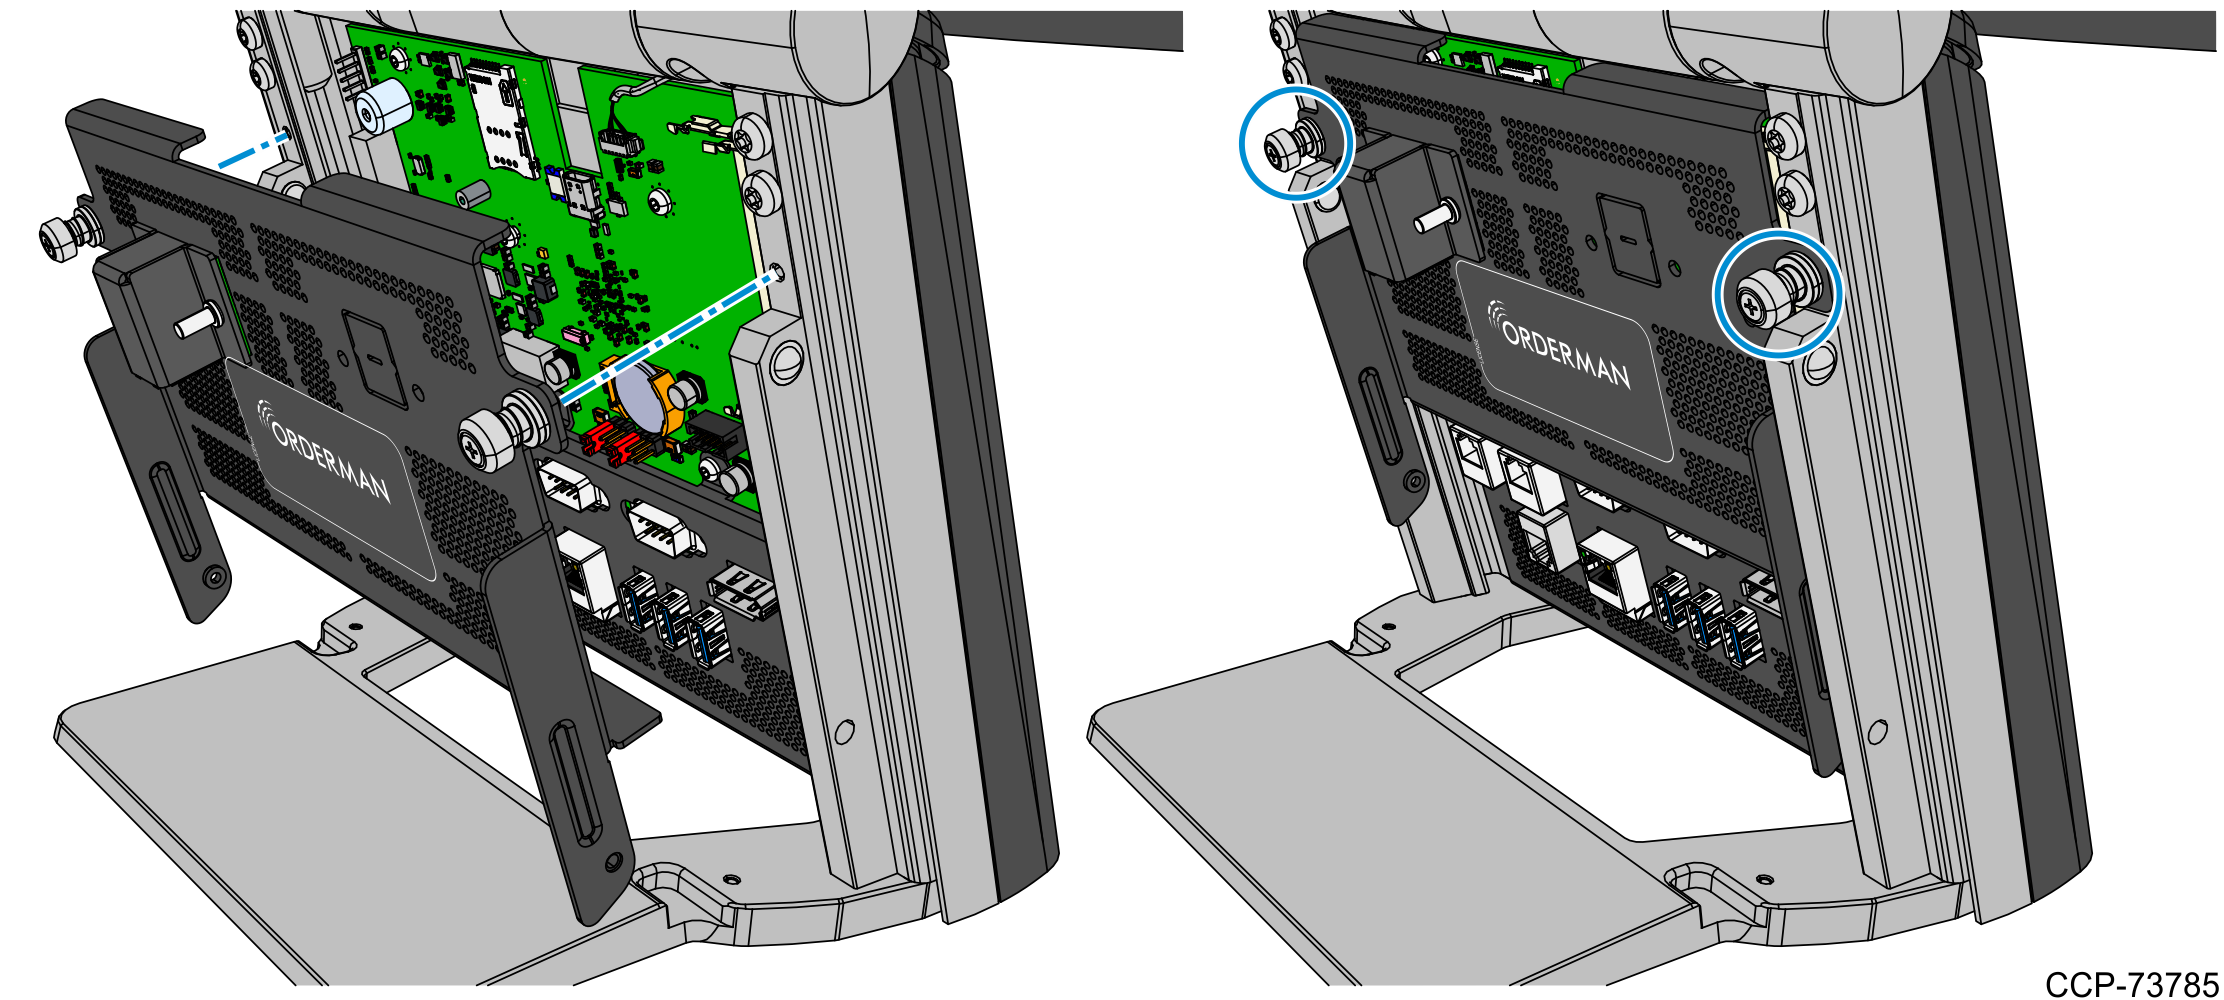
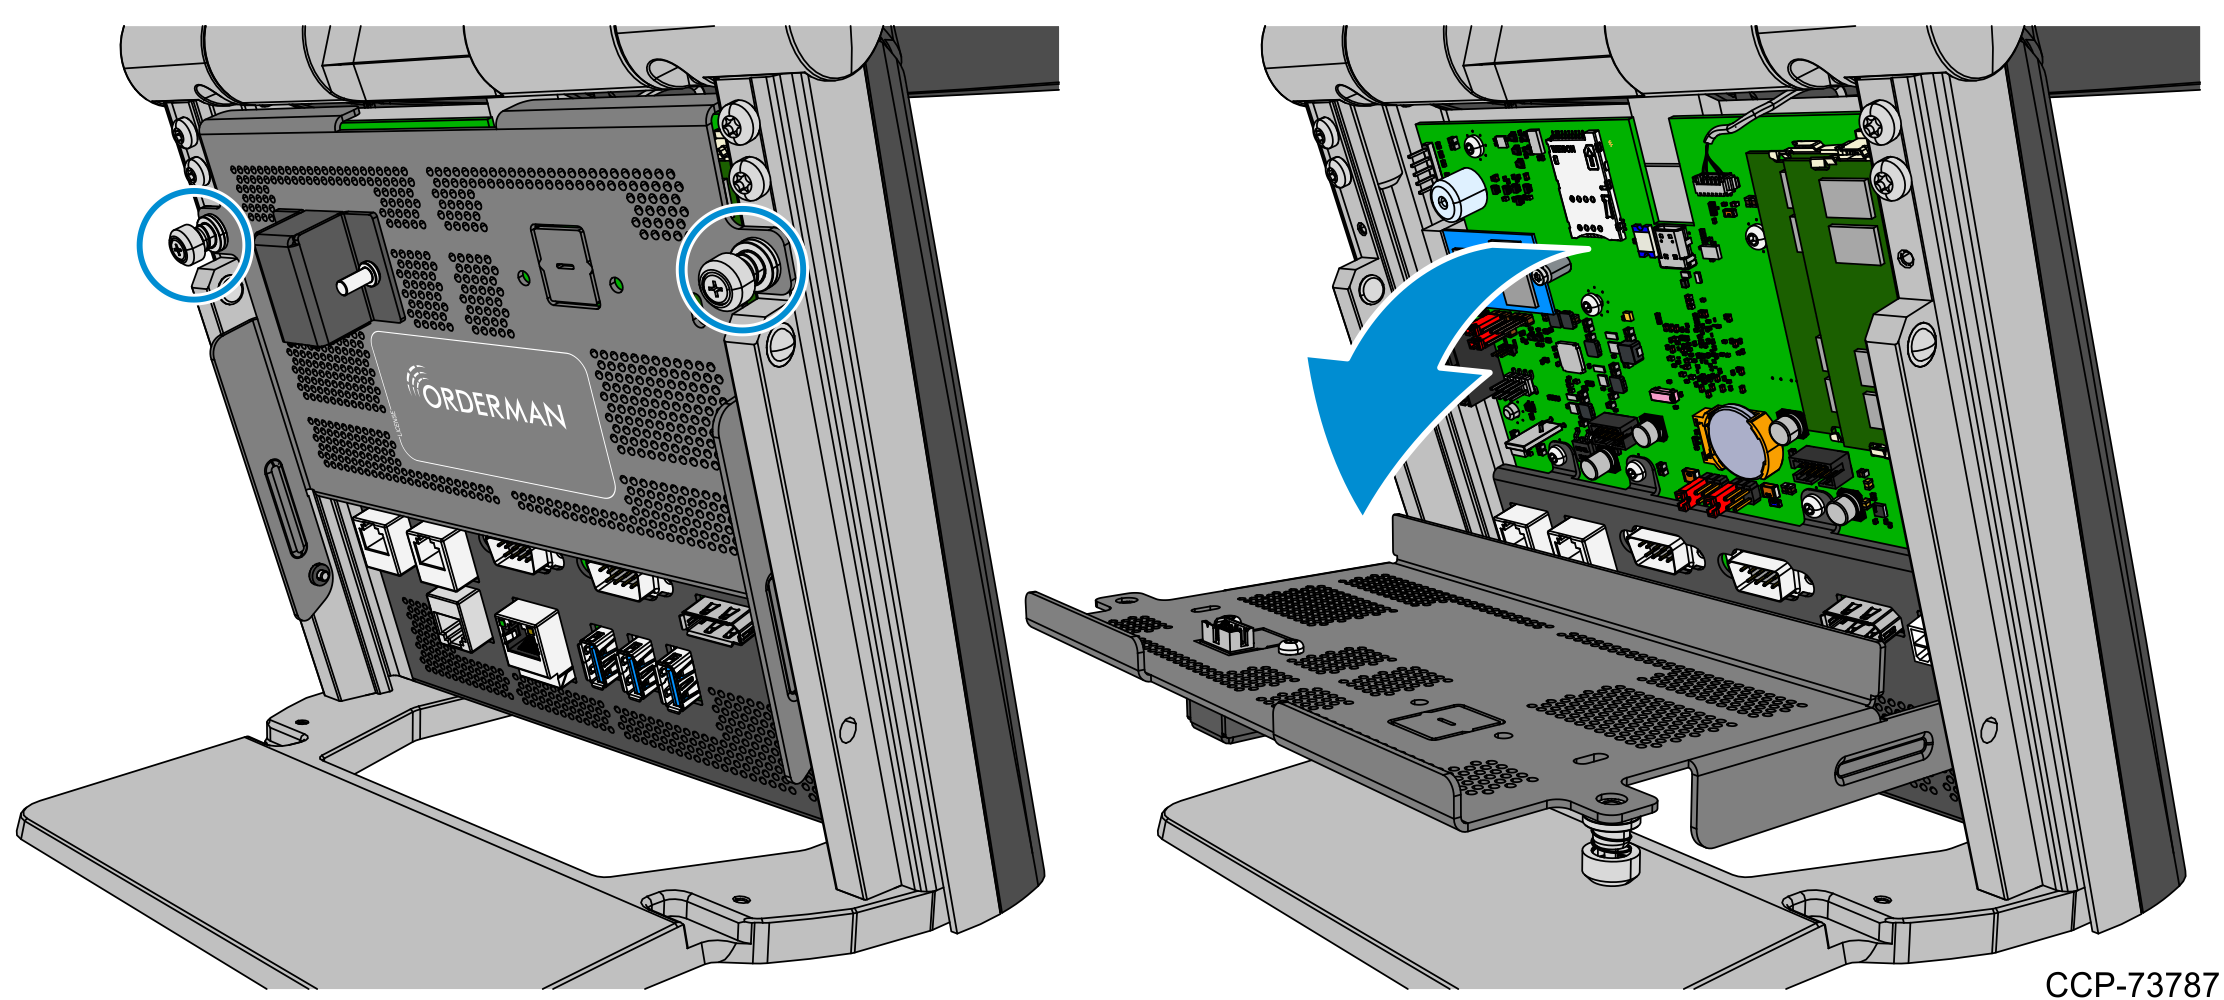
4.Loosen the two thumbscrews to remove the I/O Door from the stand.
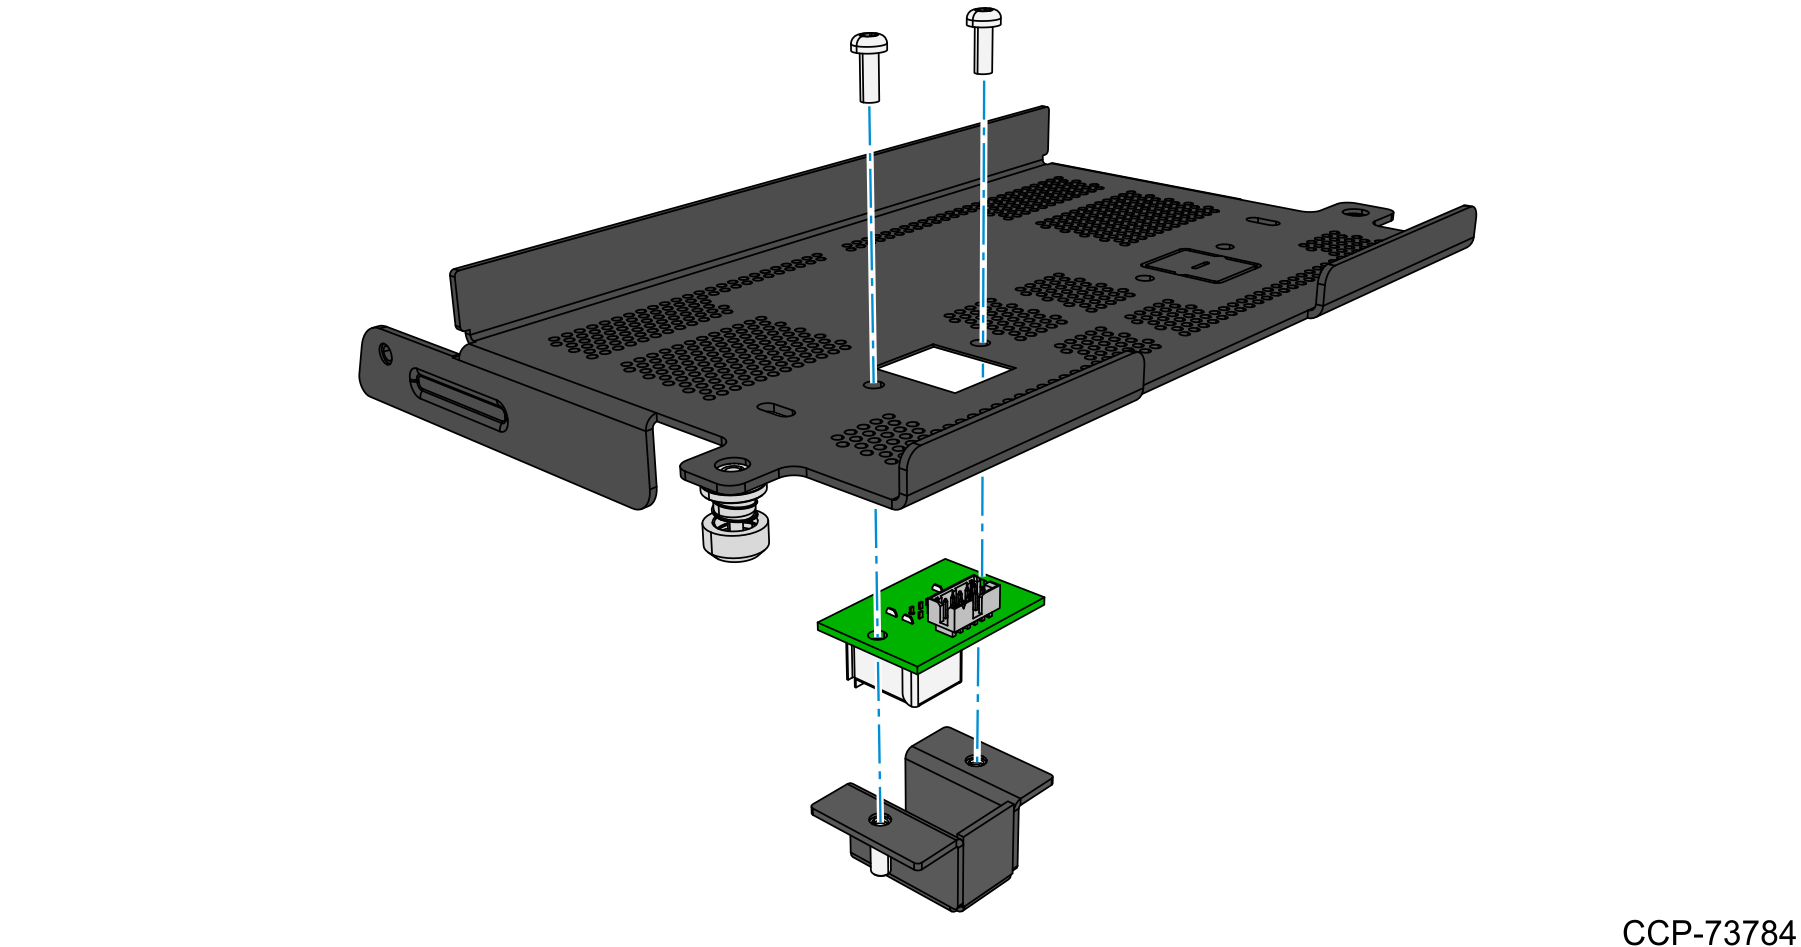
5.Using the tip of a flat screwdriver or object, remove the left-hand side knockout panel to create an access hole for the daughter card.

6.Remove the two torx screws from the +24V Powered USB kit assembly.
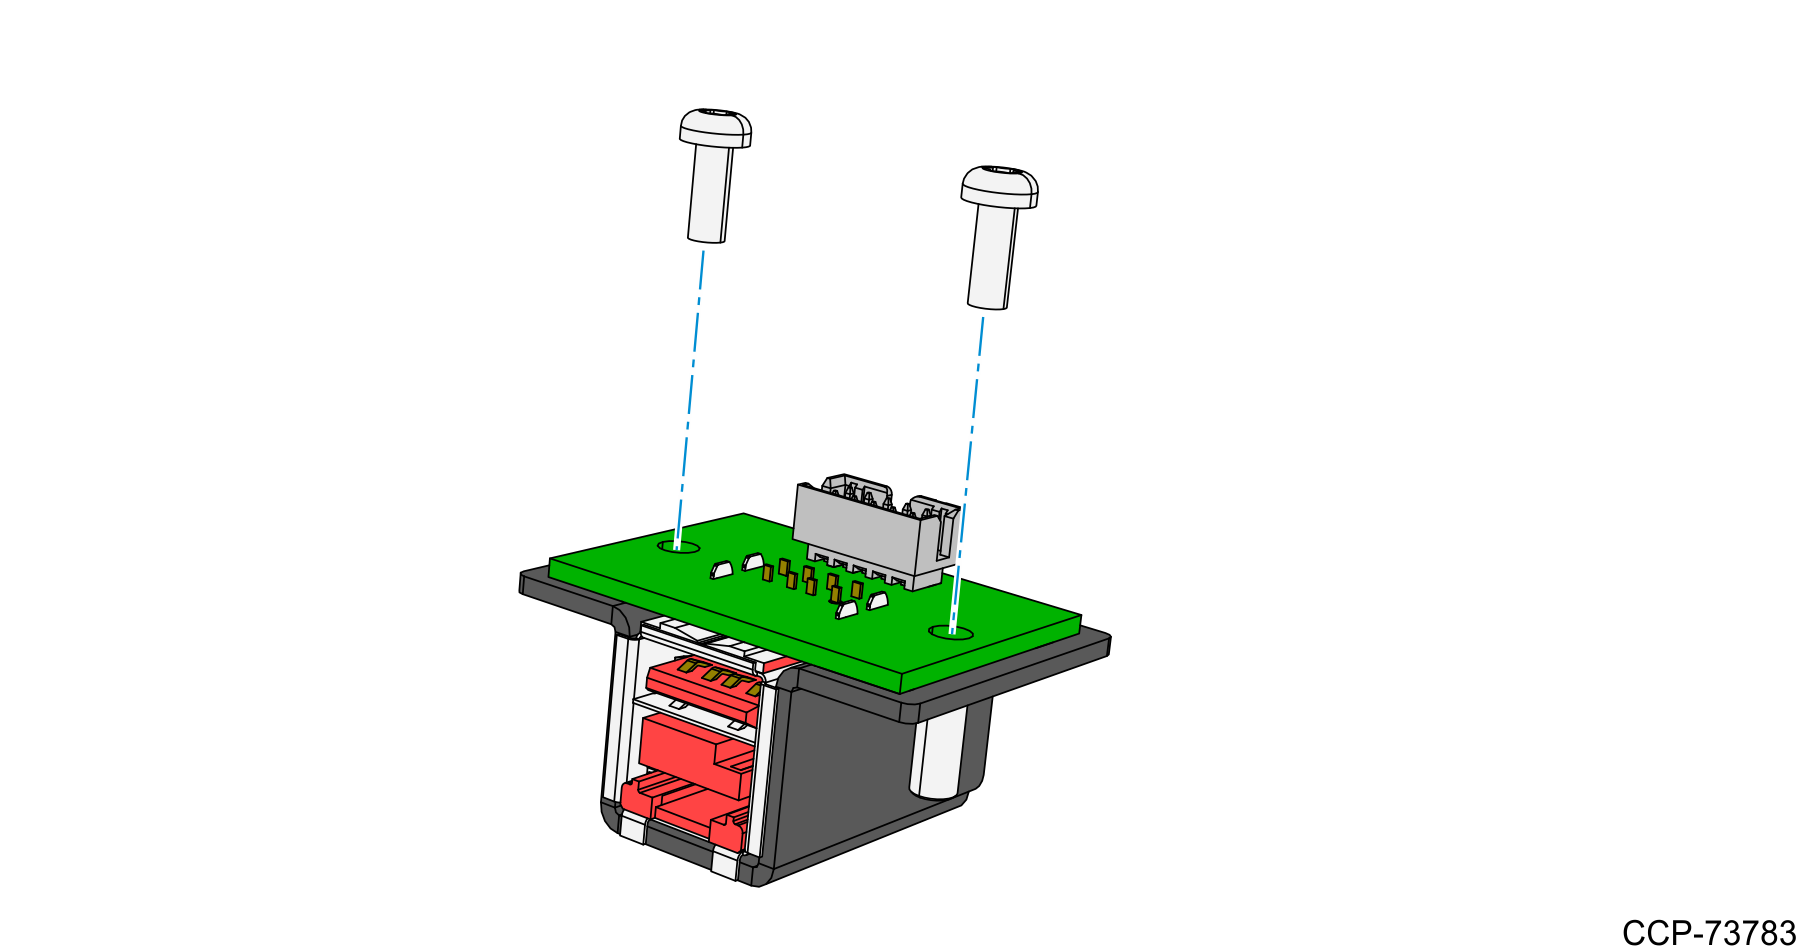
7.Mount and secure the +24V Powered USB assembly to the I/O door using the two torx screws.
8.Mount the I/O Door to the stand and secure the top part of the door using the two thumbscrews.
9.Secure the bottom part of the I/O Door to the stand using an M3 torx screw on each side.
10.Loosen the two thumbscrews and open the I/O Door.
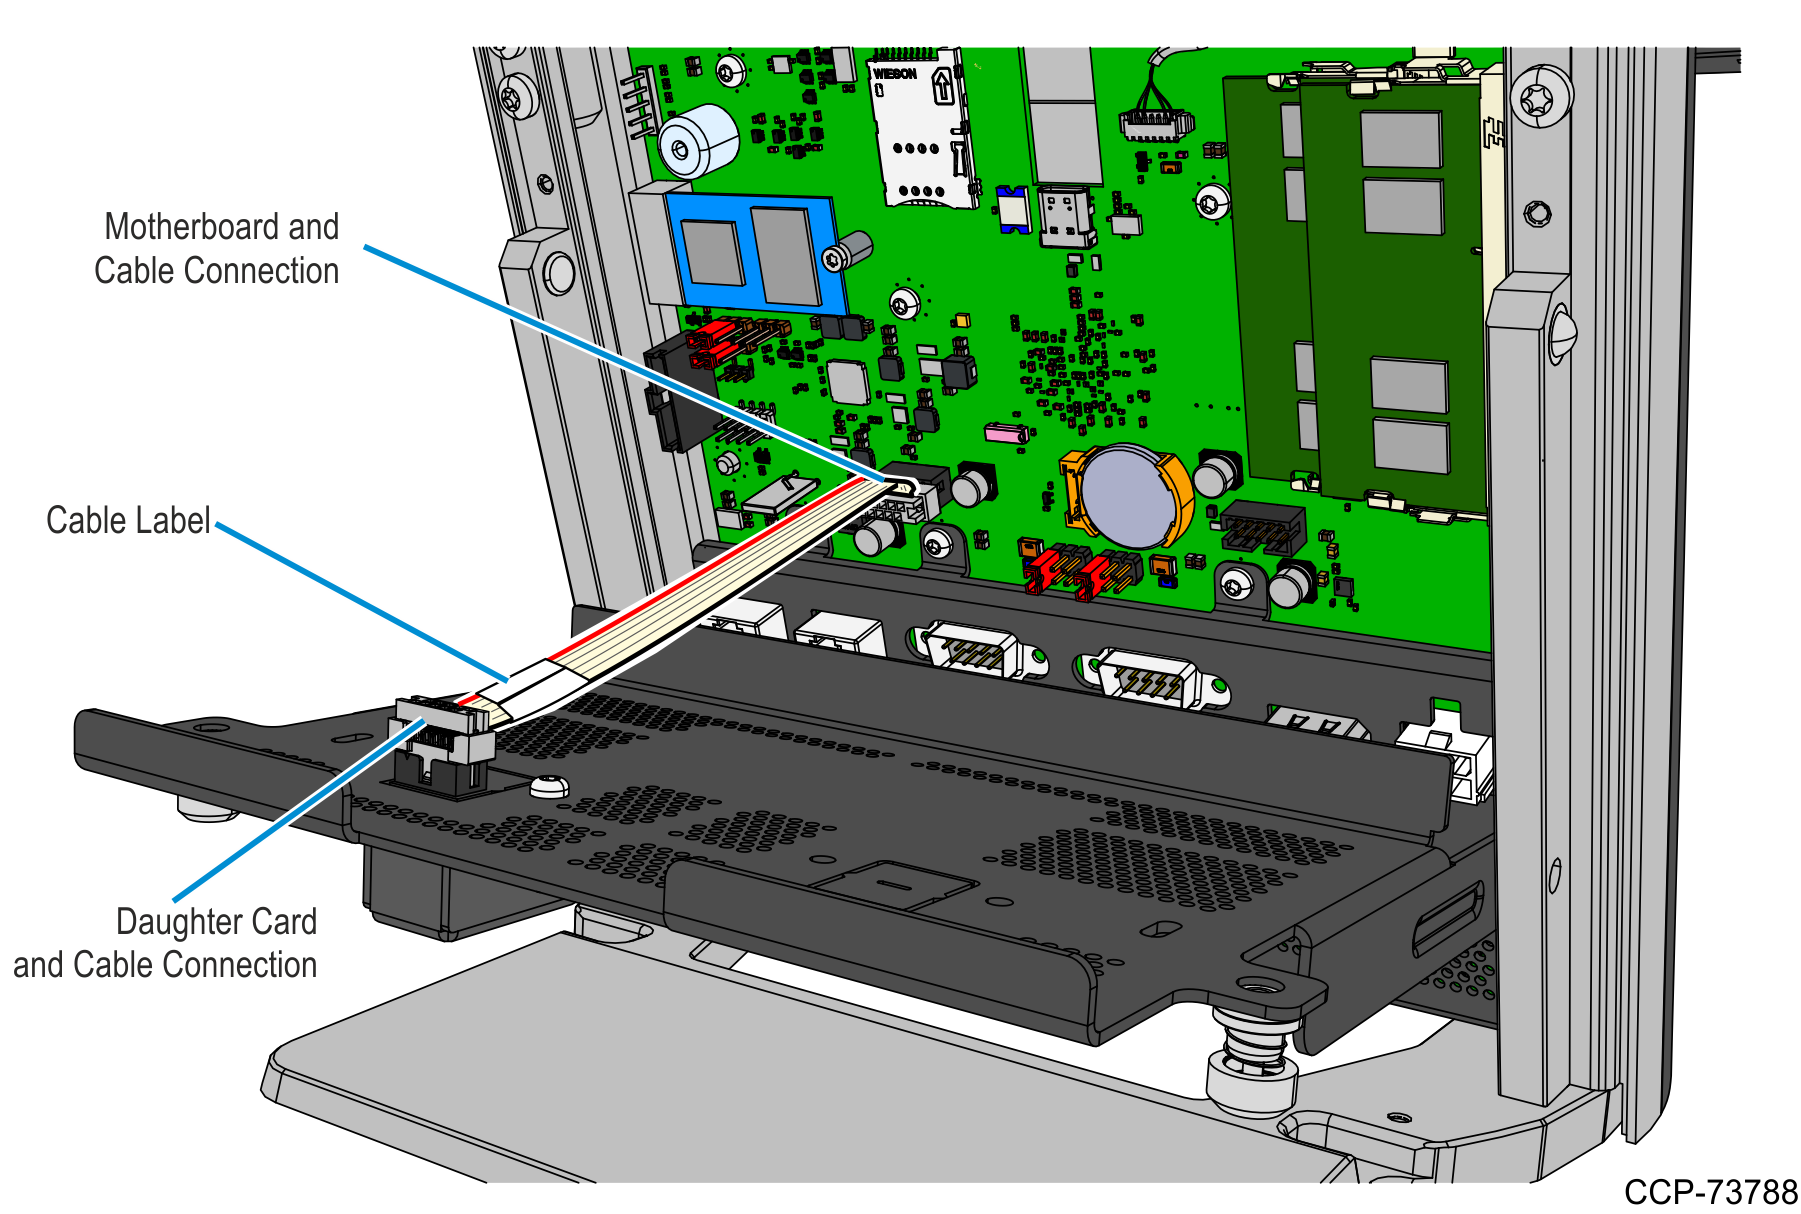
11.Connect the 24V Powered USB ribbon cable to the Daughter Card and Motherboard as follows:
a.Connect the cable connector near the cable label to the Daughter Card.
b.Connect the other cable connector to the Motherboard.
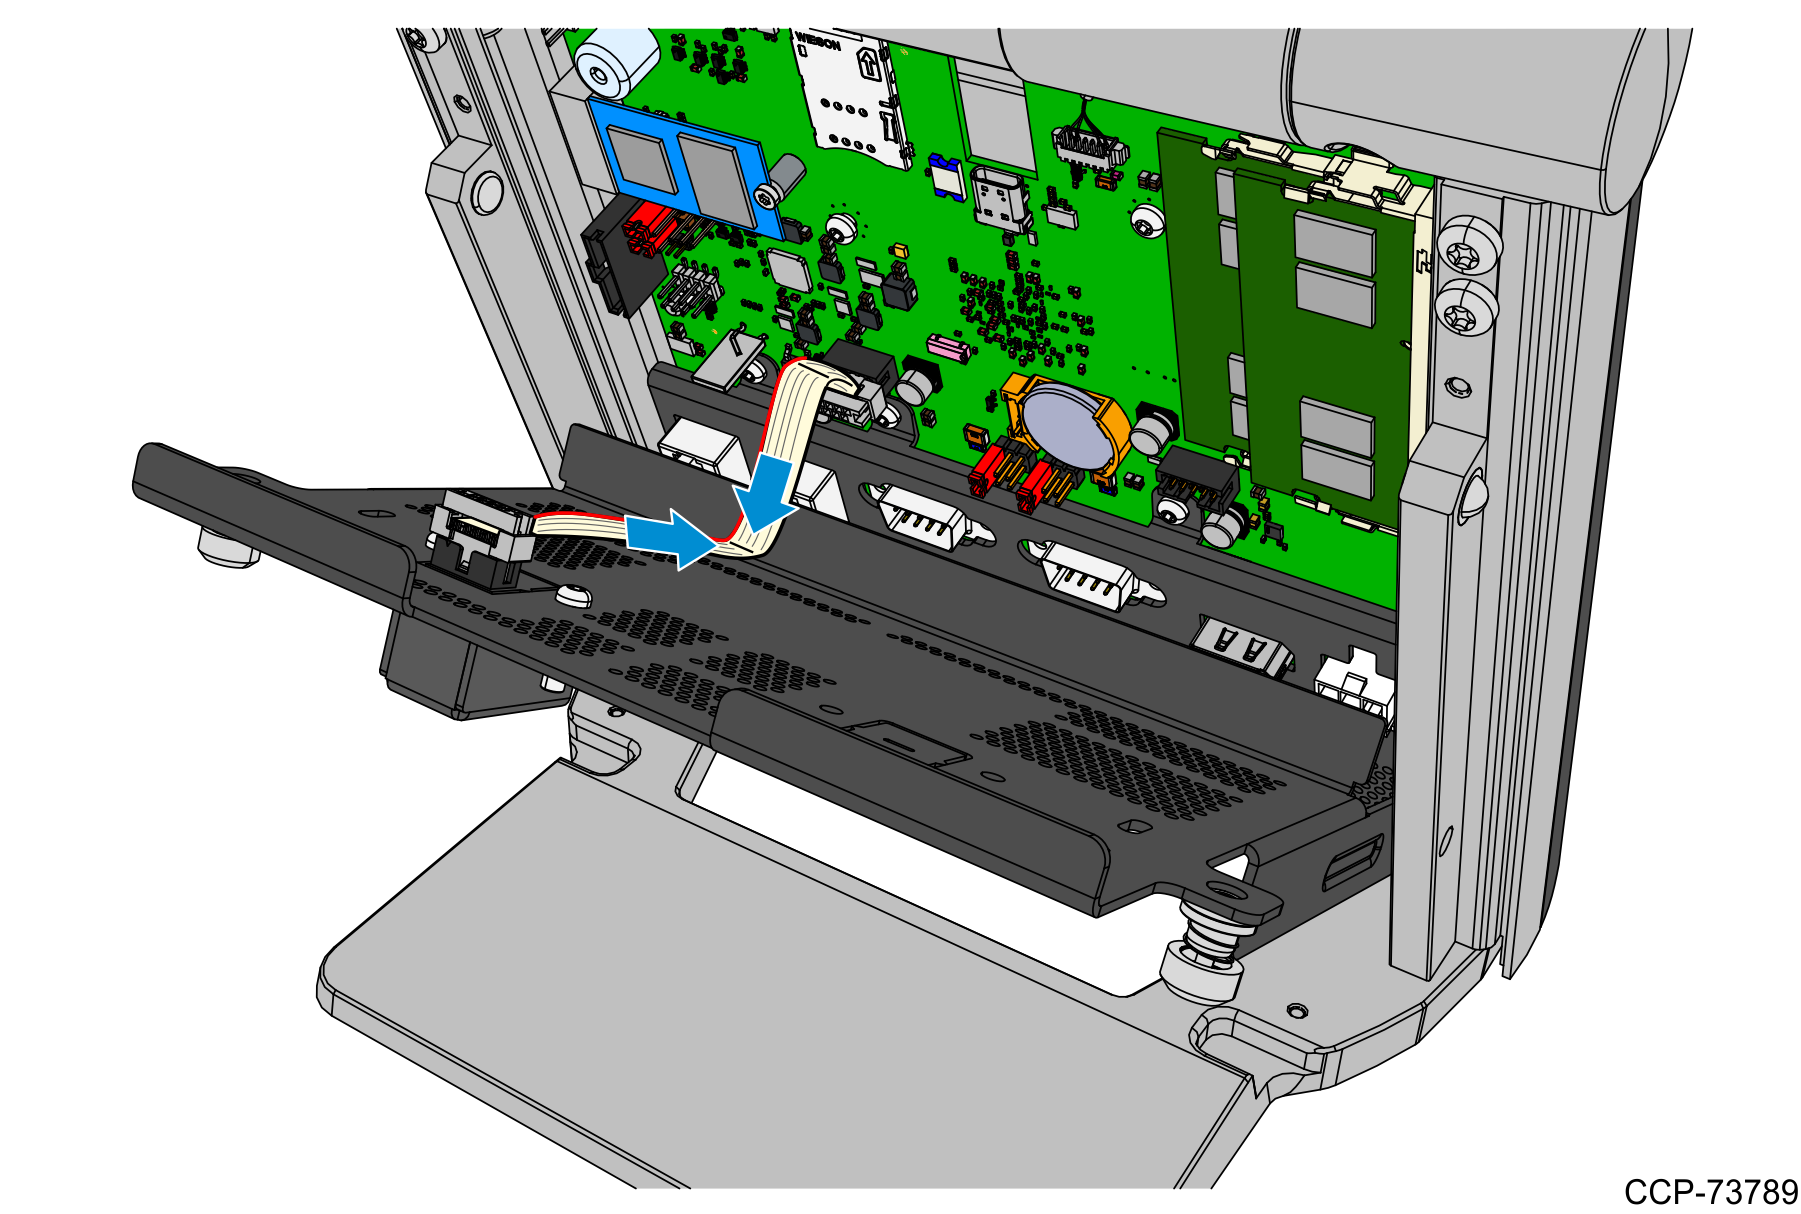
12.Partially close the I/O door and use your finger to fold the ribbon cable downward. This is to make sure that the ribbon cable does not fold upward when closing the I/O door.
13.Close the I/O Door and secure it to the stand with two thumbscrews.